It is important to keep your WinSMS contact information and profile settings up to date.
My Profile – Updating Contact Details And Preferences
You can update your WinSMS details in the WinSMS client zone.
Click here to go to the WinSMS client zone and log in with your WinSMS username and password.
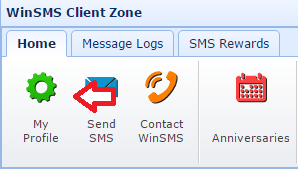
Click on the “My Profile” button.
Basic Settings
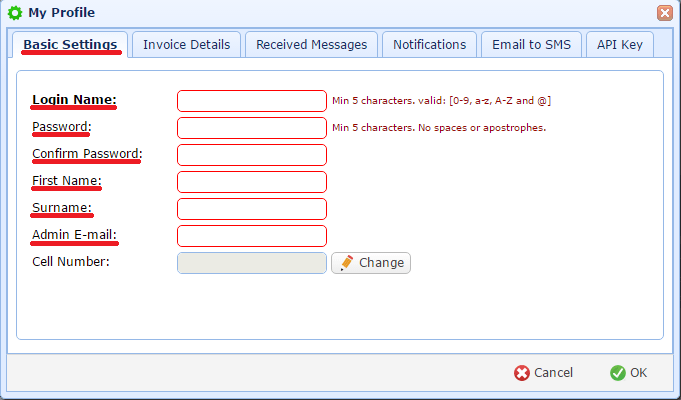
The “Basic Settings” tab is where you change your basic WinSMS profile settings.
On the “Basic Settings” tab you can change the following…
Login Name: This is your WinSMS username.
Password: This is your WinSMS password. This field is case sensitive.
Confirm Password: You only need to confirm your password if you change it on the Password field. Leave this alone if you did not change your password, confirm your password if you did change it.
First Name: This is the first name of the person using/responsible for the WinSMS account.
Surname: This is the surname of the person using/responsible for the WinSMS account.
Admin E-mail: This is the e-mail address of the admin person.
Cell Number: This is the registered cell phone number on the WinSMS profile. We will cover changing this in the next step.
If you change anything please click on the “OK” button and confirm your setting changes.
In order to change your “Cell Number” you will need to confirm a security code. For instructions on how to change your Cell Number please click here.
Invoice Details
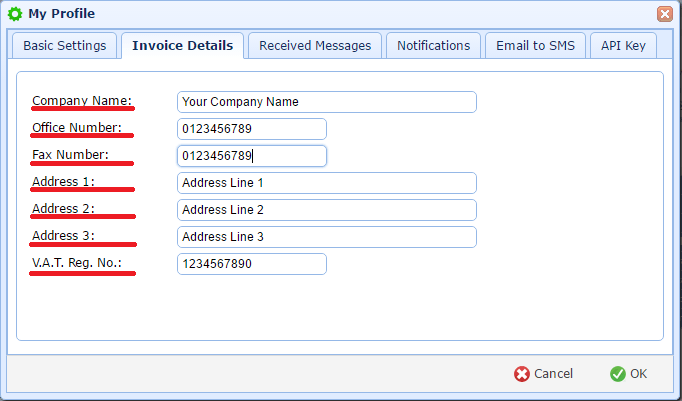
The “Invoice Details” tab is where you change your details for your invoices from WinSMS.
On the “Invoice Details” tab you can change the following…
Company Name: This is where you put your company name. If your WinSMS account is for personal use please put Private as your company name. This field is required and will appear on your invoice.
Office Number: This field is for your office contact number. This number will be used if we need to contact you. This field is not required and will not appear on your invoice.
Fax Number: This field is for your fax number. We will use this field if you require documents to be faxed to you. This field is not required and will not appear on your invoice.
Address details can be your physical address or your post office address.
Address 1: This is the first line of three that you can use for your address details. This field is not required and will appear on your invoice.
Address 2: This is the second line of three that you can use for your address details. This field is not required and will appear on your invoice.
Address 3: This is the third line of three that you can use for your address details. This field is not required and will appear on your invoice.
V.A.T. Reg. No.: This field is for your V.A.T. Reg. No. (Value Added Tax Registration Number) if you have one.
If you change anything please click on the “OK” button and confirm your setting changes.
Received Messages
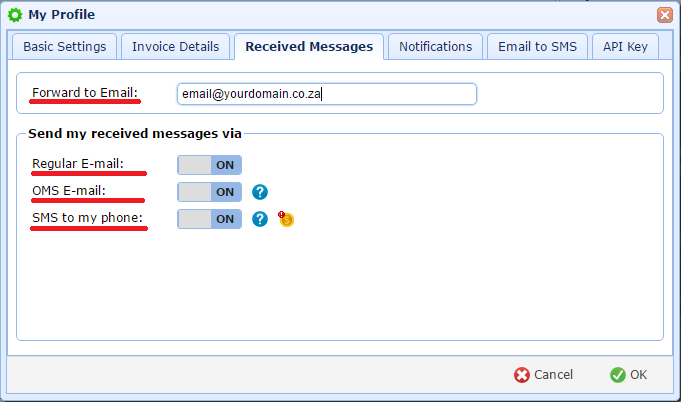
The “Received Messages” tab is where you change your e-mail address for your WinSMS replies and you choose your reply options.
On the “Received Messages” tab you can change the following…
Forward to Email: This field is for your email address where you want your WinSMS reply messages and low credit notification emails to go to. This field is required.
Send me received messages via:
Regular E-mail: Turn this slider button on if you want to receive your WinSMS reply messages to the email address specified in the “Forward to E-mail” text box.
SMS to my phone: Turn this slider button on if you want to receive your WinSMS reply messages via SMS to your cell phone number on your WinSMS profile. You can find your cell phone number on the “Basic Settings” tab. For instructions on how to change your Cell Number please click here.
Please Note: If you enable the “SMS to my phone” option, a cost will incur per reply sent to your cell phone number. One or more WinSMS credits will be deducted from your WinSMS account per reply, depending on the length of the reply message and the destination.
If you change anything please click on the “OK” button and confirm your setting changes.
* Please note that the “OMS E-mail” option is no longer supported.
Notifications
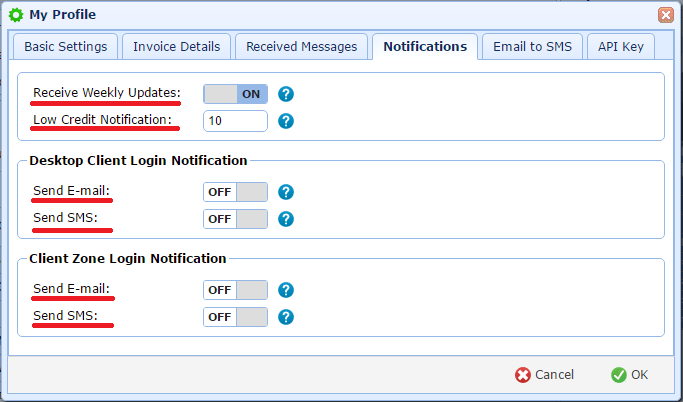
The “Notifications” tab is where you change your settings for the WinSMS notifications your receive.
On the “Notifications” tab you can change the following…
Receive Weekly Update: Turn this slider button on if you want to receive the WinSMS weekly update email. This weekly email might include your WinSMS credit balance, news, notifications, specials or discount vouchers, surveys, FAQ, tips and tricks on how to use our products and services.
Low Credit Notification: When your WinSMS credit balance reaches the value in this text box, you will receive an SMS message and an email to your registered WinSMS cell phone number and email address, informing you that your WinSMS credit has reached this predefined level.
Desktop Client Login Notification:
Send E-mail: Turn this slider button on if you want to receive an email letting you know when someone has used your WinSMS username and password to log into the WinSMS desktop client.
Send SMS: Turn this slider button on if you want to receive an SMS message letting you know when someone has used your WinSMS username and password to log into the WinSMS desktop client. Please note: a WinSMS credit will be deducted from your account for each notification sent.
Client Zone Login Notification:
Send E-mail: Turn this slider button on if you want to receive an email letting you know when someone has used your WinSMS username and password to log into the WinSMS Client Zone.
Send SMS: Turn this slider button on if you want to receive an SMS message letting you know when someone has used your WinSMS username and password to log into the WinSMS Client Zone. Please note: a WinSMS credit will be deducted from your account for each notification sent.
If you change anything please click on the “OK” button and confirm your setting changes.
Email to SMS
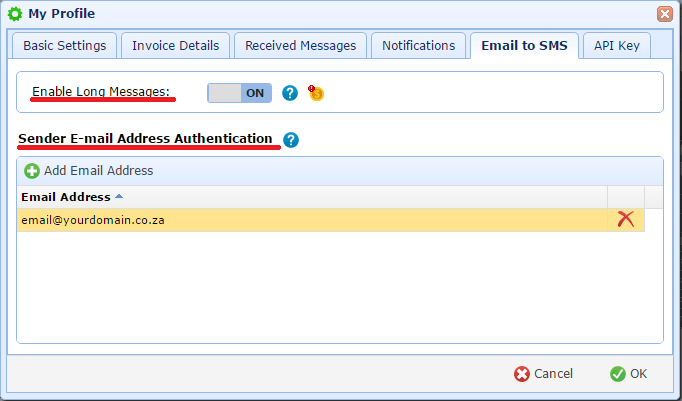
The “Email to SMS” tab is where you change your settings for long message support and where you add email addresses for “Sender E-mail Address Authentication”. For more information on the Email to SMS service please click here.
On the “Email to SMS” tab you can change the following…
Enable Long Messages: If this slider button is turned off then the first 160 characters of your email body will be converted into your SMS message when using the email to SMS service. Turn this slider button on if you want to enable up to 918 characters of your email body to be converted into your SMS message when using the email to SMS service. Please Note: one WinSMS credit will be deducted from your WinSMS account per message part if you enable long message support.
Sender E-mail Address Authentication: Use the “Add Email Address” button to add any email addresses that will be used to send email to SMS.
If you change anything please click on the “OK” button and confirm your setting changes.
API Key
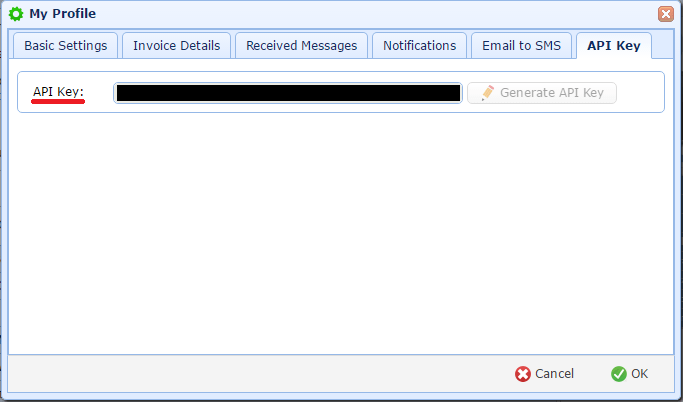
The “API Key” tab is where you can generate or view your assigned API key.
The API Key is used for programmers using our WinSMS API to integrate SMS messaging with their database applications, custom software and web sites. For more information on the WinSMS API please click here.
If you need any assistance please don’t hesitate to contact us here.

